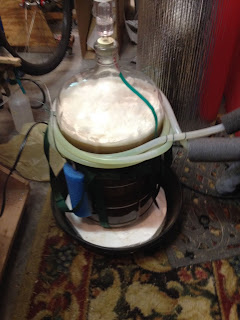
The keg has a dip tube with a screen over the end, plus a false bottom to keep the bag off the bottom and avoid scorching the grain.
The pump draws from the bottom, past a tee fitting with a temperature probe, and returns the wort back to the top.
The grain bag is held in place, and the return hose is inside the bag. Not sure if this makes a difference, but I like the idea of keeping the fluid moving through the grain bed.
I use a dipstick marked off in gallons to fill the keg with 7.8 gallons of water. This accounts for water absorbed by the grain during mashing, and for water lost during the boil.
Weigh out the specialty grains.
Weigh out the base grain.
And crush the grain in the mill.
Once the water is up to strike temperature (run the pump and turn on the burner and the controller will take it there) add the grains to the strike water and mix it well.
Reset to the mash temperature, which in theory is where it will be after adding the cold grains to the hot water. I'm finding the temperature doesn't drop much at all, contrary to the books. I believe this is because the thermal mass of the keg and burner is much greater than the thermal mass of 13 pounds of grain.
I stir once in a while, and check the progress of the mash with my refractometer, but it really just an hour or more of waiting. The refractometer is an easier way to check the gravity than drawing a sample, cooling it off, and using a hydrometer. It works by using the change in the refractive index with the sugar concentration. It's marked in Brix instead of specific gravity, but I've got the converted values for both the pre-boil OG and the final OG. In this case I was shooting for 12.6 Brix, or 1.051 OG pre-boil.
And my cross-check with the hydrometer matches up pretty well. Now on to mash out and the boil.
I hoist the mash bag out with a rope and pulley. Today was the first trial of my ratcheting pulley, and boy is that an improvement!
I let the bag drain and squeeze as much out of the grain as I can, wearing rubber gloves. This all gets boiled, so no worries about contamination from my crabbing gloves touching the beer.
I'm using a plate chiller, so my hops are in a mesh bag suspended in the keg with a hop spider.
I crank up the burner to 212 and start to time the boil with the first hop addition, once a good rolling boil gets going.
When I have about 10 minutes until flame out, I reconfigure my hoses to include the plate chiller in the loop. With no water flowing, just hot wort, the chiller gets sterilized. This IPA uses a bunch of hops, including a big addition after flame out. I run the chiller water to bring the wort to about 180 and circulate over these hops for 15-20 minutes. This adds some really great hop aroma, and this time I'm using the cascade hops I grew last summer.
After the hop stand/whirlpool, I run the water in the plate chiller and it comes down to about 90 in less than 10 minutes. The last pass through the chiller goes into the carboy at 75, or thereabouts.
I hit my OG of 1.06, but lost a bit of volume to all those whole hops. I try to get 6 gallons into the carboy, so with trub and yeast cake I can yield 5 gallons of beer.
I'm able to get all the wort except the small amount in the pitcher that's left behind in the keg. It takes a bit of doing to drain it all out of the hoses, but this is good stuff, so I hate to lose any.
To give the yeast a good start, I aerate the wort with an air pump, filtered to keep things sanitary and using a sanitized metal airstone.
Here's the starter with the yeast settled out. 146 billion hungry yeastie beasties.
I pour off the excess and swirl the yeast into suspension before pitching.
Here's the heat pad to warm up the brew.
And the temperature probe insulated from ambient and pressed on the side of the carboy.
And to keep things cool, my glycol hoses. These go to the freezer compartment of my beer fridge, where I have a container of glycol and a pump connected to the temperature controller. The controller will run either the heater pad, the glycol pump, or neither if the temperature is within a degree of the target setting.
This all gets wrapped up in insulation and the magic begins!


